Main Window
Jul 12, 2023

Main Window
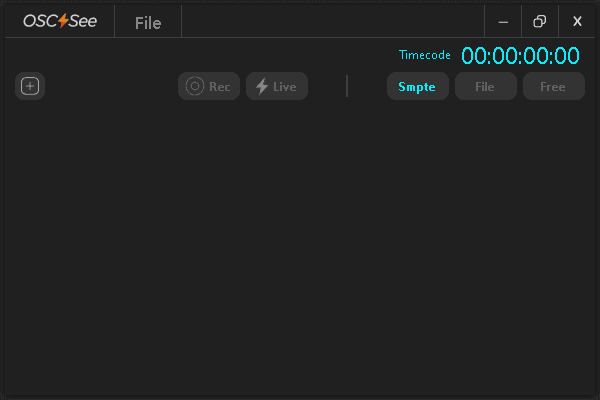
As you can see, the window is quite simple, the idea is to make it straightforward and easy to understand. Currently, it's empty because the essence of OSC See lies in the Tracks, and none have been created yet. Let's break it down.
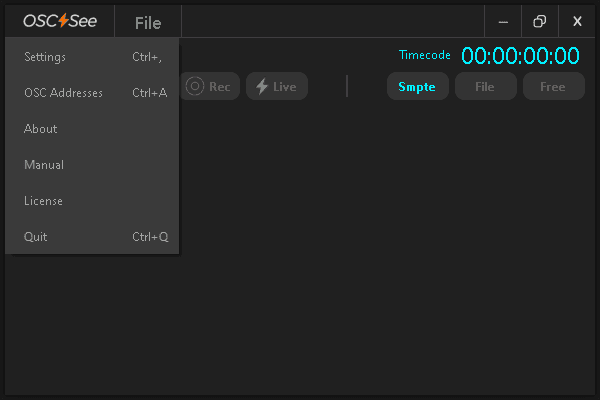
In the top menu, where the logo appears, you can find the dropdown menu for configuring OSC See for audio, ports, and project OSC addresses, as well as access to the online manual and licensing information.
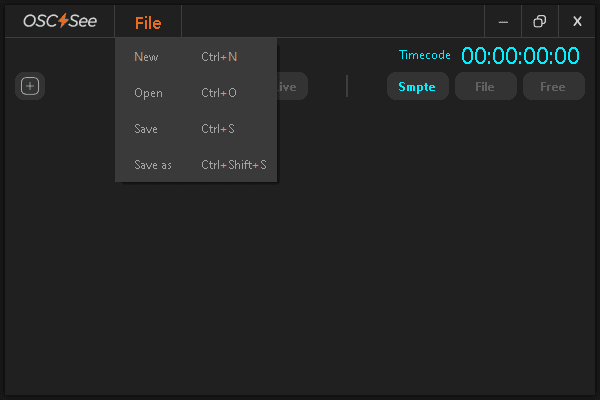
In the next dropdown menu, labeled "File," you will find options to create a new project, open and save your projects, and shortcuts are also available.
Back in the main window, you'll find the operational functions of OSC See.
Create Tracks
On the left, with the "+" button, you can create Tracks, which are the foundation of OSC See.
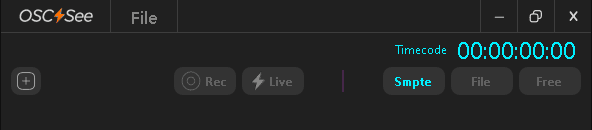
Communication Mode Buttons, Rec and Live Buttons
Moving to the right, you will find the two operation buttons for OSC See, "Rec" and "Live." These buttons form the basis of OSC See's communication mode.
If neither button is selected, OSC See won't communicate with any input or output ports.
If you want to record commands, you should activate the "Rec" mode, and if you want to control other software, press the "Live" mode.
Timecode Mode Buttons
On the right, you'll find the timecode source selector. OSC See has three ways to generate or integrate timecode.
SMPTE Mode
The first one, SMPTE, uses the LTC SMPTE Timecode protocol that enters through the audio interface.
To receive LTC SMPTE Timecode, you must have assigned the appropriate audio input from your device in the Settings menu; otherwise, you won't be able to receive control through SMPTE. In this mode, time is received externally via the LTC SMPTE protocol.
File Mode
In the middle, you'll find the "File" mode, which activates the option to set the timeline with audio files, whether they are in MP3 or WAV format. You can load them with the musical note symbol, which you can see in the Tracks once they are created. In this mode, the timeline and duration are defined by the audio file you are working with. You can also see the waveform, a very useful visualization tool for creating your cues in the tracks with great precision.
Free Mode
In "Free" mode, OSC See generates an internal timecode to execute your cues. This function is very useful for creating sequences or scenes for setups or installations that you want to program autonomously. It also includes the option of looping to execute a cyclic sequence for an extended period.
Note: Above these buttons, you will find the Timecode display, which runs or is shown according to the Timecode source you select.
Tracks
Tracks are the core of OSC See's functionality; you can't do anything without them. As mentioned, you can create the number of Tracks you need with the "+" button, but keep in mind that only one Track can be executed at a time.
When you create a Track, you can see it collapsed with many icons and Track controls.
Expand and Collapse Button
The first button, which looks like an arrow, is the expansion button. With this button, you can expand the Track and view the details for editing. When it's collapsed, it can be used to control the show without expanding the editing window.
Lightning Bolt, OSC See Icon Button, is the most important button in OSC See.
This is the Synchronization button, and it's the only way to control programs or record commands or cues.
When you are controlling a show and running your setlist, you will need to press which Track you want to have control, as many times in a production you work with the same SMPTE timecode. It wouldn't be good if the tracks in your setlist with the same schedule execute commands from other tracks.
Remember that you will have to activate them both for recording and for synchronizing tracks.
Music Note Button
With this button, you can load audio files into your track. Once loaded, you can play them in the Track, view the waveform, edit your commands, and zoom in for more precise editing.
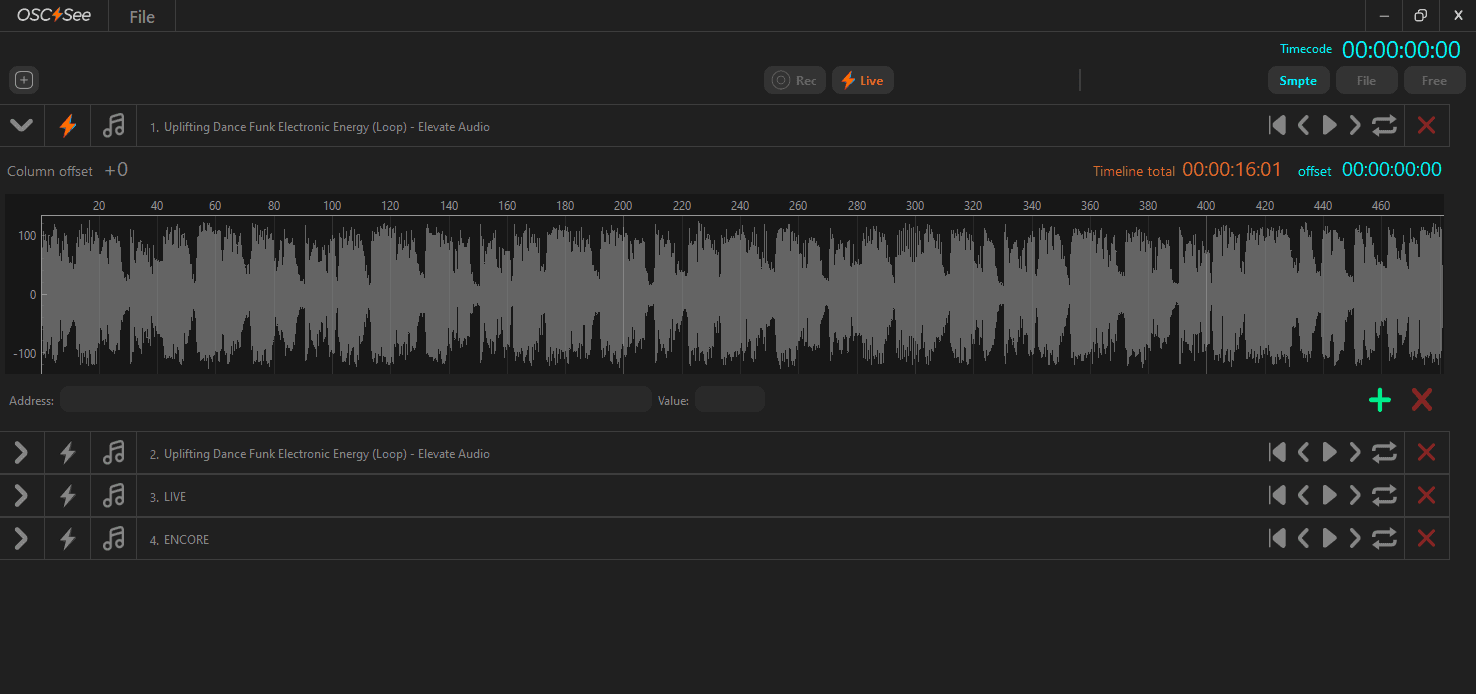
You can load files in WAV or MP3 format. Note that you can launch the audio tracks from OSC See in shows if necessary, which is quite useful for corporate events.
Note: In Mac the waveform preview its only available with WAV Files.
Track name
In the empty space in the middle, you can put the name you prefer for your track.
If you load an audio file, the file's name will automatically appear on the bar. If you wish, you can also edit it later and put the name of your preference for simpler use.
Track Playback Controls
With these controls, you can rewind the track from the beginning, move backward or forward in 10-second intervals, play or pause the track, and activate the Loop mode if you want to control a scene repetitively.
Delete Track Button
With the last button, the "X," you can delete the track.
Note: You can arrange the order of your tracks or setlist just dragging them with the mouse as you prefer.